Elderflower gin- cheers m’dears

IMG_1668It’s turned out to be a fantastic year for elderflowers round here and particularly on a sunny day the scent is pretty intoxicating. I reckon everyone round here is busily making elderflower cordial- I know this because every chemist in a 25 miles radius has sold out of citric acid which you need to make the stuff. So I set about making elderflower gin instead. I could wax lyrical about how fantastic it is, how everyone who has tasted it can’t stop at one glass(you know who you are) but what I’d prefer is for you to get out into the countryside before it is too late, gather up a bagful of creamy blooms and make some for yourself. Here’s the recipe which is child’s play to make and ready to drink in a week.

Elderflower gin

20-30 elderflower heads
1 unwaxed lemon
1 750ml bottle gin(nothing fancy- a supermarket brand will do)
200-250g caster sugar, depending on how sweet you like it
IMG_1679
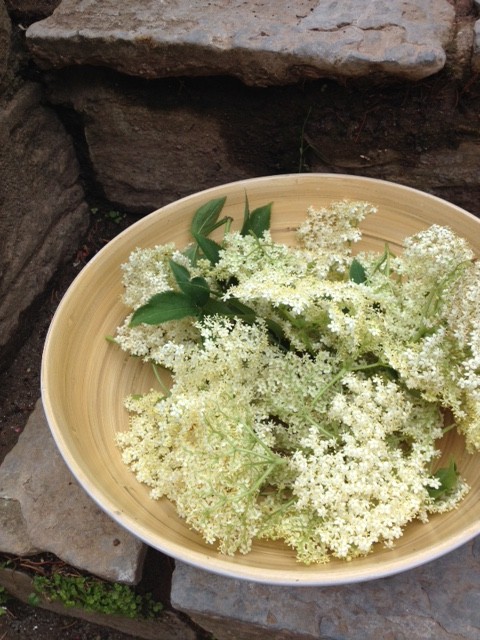
Shake each flower head upside down to release any creatures hiding in the flowers, then put them in a large wide necked jar. Pare the zest from the lemon in wide strips, avoiding the white pith if possible, then add to the jar with the lemon juice, gin and sugar. Put on the lid and give the jar a good shake to dissolve the sugar. Put a sheet of cling film directly on the surface on the liquid to avoid the flowers turning brown(though it doesn’t affect the flavour if you do get a bit of discolouration) Seal the jar and leave in a cool dry place for a week.
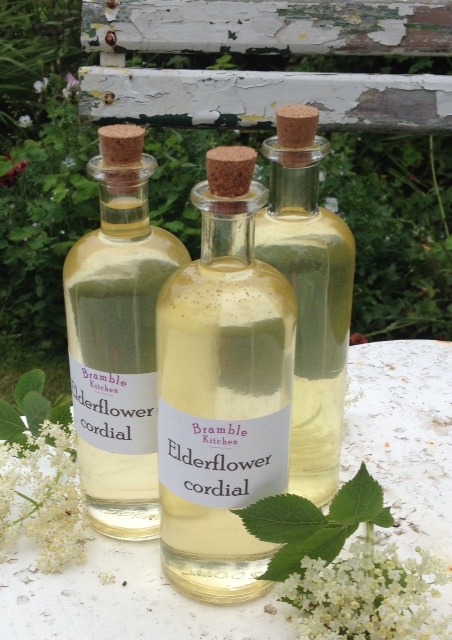
Strain the mixture through a sieve lined with muslin then pour into bottles.Your elderflower gin is now ready to drink. Keep a bottle in the fridge or freezer and serve in chilled shot glasses, or for a longer drink top up with fizz or tonic water.
FullSizeRender

A spring tart

After three long months without a proper kitchen, 400 tea bags, industrial quantities of chocolate hobnobs and a daily battle with dust the builders have finally left. At last I can cook again and like any addict denied their fix I am overdosing at ever turn. Cakes for the village shop- of course, friends for the the weekend, why not? And as a huge thank you for all our lovely neighbours who took us in and fed us when we were staring ready meals in the face we are having a gang of them over this week for a kitchen supper washed down with a few glasses of wine. Over the next few blogs I plan to share the recipes for the meal with you and today it’s the starter. With piles of fabulous local asparagus now in abundance this tart seemed like a no brainer. No eggs or cream, just a puffy pillow of a tart that can be assembled ahead and slipped into the oven while our guests enjoy a glass of fizz. I don’t want you to think I’m showing off but I made the pesto that I smeared under the spears with the wild garlic that grows in profusion around the local riverbanks and it’s not too late to make some for yourself if you are quick. If that’s not an option a bought pesto will do just fine. Happy days.

Asparagus and pesto tart
Serves 4

IMG_1601 (1)

20 fine asparagus spears
320g pack ready rolled puff pastry (I used Tesco finest-very good)
8 tsp pesto
100g soft rindless goats cheese
a little olive oil
4 tbsp freshly grated parmesan
sea salt and freshly ground black pepper
green salad, to serve

Snap each asparagus spear, it will break where the base becomes woody. Peel the end of each spear.Line 2 baking sheets with baking paper. Unroll the pastry and cut into four oblongs about 10cm by 5cm. They need to be a bit larger than the trimmed asparagus and wide enough to take 5 spears with a small margin.
IMG_1595 (1)

Put the pastry oblongs on the baking sheets and mark a line around each about 1cm in from the edges using the point of a sharp knife. Spread with pesto inside the marked lines and spoon over a few blobs of cheese. Snuggle 5 asparagus spears over each.IMG_1596 (1)

Brush lightly with olive oil and season with salt and pepper. Sprinkle with parmesan and bake for 20-25 mins until the pastry is crisp and golden and the asparagus is tender.IMG_1598 (1)

Serve with a green salad with a dressing pimped up with chopped herbs- chives, watercress and basil are all good
IMG_1600 (1)

Something for the weekend?

When we lived in France one of our favourite easy meals was confit of duck legs with a pile of garlicy sautes and a big green salad. You would find ready prepared confit in every market, either vacuum packed or in jars, or in an emergency in tins from the supermarket where they would invariably be on special offer. Now we are back in Somerset this is not a treat I can get hold of easily but I have found that if I slow roast duck legs for a couple of hours the resulting meat is almost as meltingly tender as confit and the skin is as crisp as shattered glass. Duck legs tend to be much cheaper than breast and to my mind have a better flavour and are much more forgiving to cook. Teamed with a pile of spiced red cabbage, which incidentally can be made a day ahead if this suits you, this makes a perfect weekend supper to share with friends.

Duck legs with red,red,red cabbage
Print Recipe
Servings Prep Time
4 25 mins
Cook Time
2 hours
Servings Prep Time
4 25 mins
Cook Time
2 hours
Duck legs with red,red,red cabbage
Print Recipe
Servings Prep Time
4 25 mins
Cook Time
2 hours
Servings Prep Time
4 25 mins
Cook Time
2 hours
Ingredients
Servings:
Instructions
  1. Heat the oven to 160C/fan 140C/Gas 3. Put the duck legs in a large roasting tin and sprinkle with sea salt, freshly ground black pepper and the five spice powder. Put in the oven to roast for 2 hours.
  2. Prepare the vegetables. Thinly slice the red onion. Finely shred the red cabbage. Grate the ginger and chop the apple. When the duck has been cooking for 1 hour, spoon about 3 tbsp of the fat off into a large heavy based pan.
  3. Reheat the duck fat, add the onion and cabbage and cook briskly, stirring for a few mins until the onion and cabbage have started to soften. Add the cranberries, ginger, apple and cinnamon stick and stir well. Season with salt and pepper and add the sugar and vinegar.
  4. Bring to the boil, then reduce the heat to low, cover tightly and cook gently for 30 mins, stirring occasionally. if the liquid starts to dry out add a splash of water.
  5. When the duck has been cooking for 11/4 hours add the potatoes to the roasting pan and stir well to coat in the duck fat. Return the duck and potatoes to the oven for 45 mins.If there is too much fat in the pan spoon some off into a bowl to use another time for roasties. It will keep in a jar in the fridge for weeks.
  6. When the duck and potatoes are tender reheat the cabbage. Spoon someonto four warmed plates and top each with a duck leg. Add the potatoes around the cabbage and serve. Sprinkle with a little chopped parsley if you have it.
Share this Recipe
Powered byWP Ultimate Recipe

Easy peasy lemon squeezy ice cream

With only three ingredients and no tedious stirring involved, this is the easiest most luscious ice cream you will ever make. Simply whip up some cream, fold in a jar of lemon curd( if you have made your own that’s great but a good quality bought one will do fine) and a little lemon zest, tip into a container and freeze. That’s it. No ice cream maker needed and the resulting ice cream will be smooth and creamy and you can scoop it straight from the freezer. So what are you waiting for?

Lemon curd ice cream
Print Recipe
Servings Prep Time
4 10 mins
Passive Time
overnight
Servings Prep Time
4 10 mins
Passive Time
overnight
Lemon curd ice cream
Print Recipe
Servings Prep Time
4 10 mins
Passive Time
overnight
Servings Prep Time
4 10 mins
Passive Time
overnight
Instructions
  1. Pour the cream into a bowl and whisk until it forms soft floppy peaks. Add the lemon curd and grate in the zest from the lemon. Fold together until evenly mixed.
  2. Spoon into a rigid container and freeze overnight or for at least 4 hours
  3. Serve in scoops as it is or with raspberries(fresh or defrosted frozen) crushed with a little creme de cassis
Share this Recipe
Powered byWP Ultimate Recipe

A clean plateful

There is much talk these days about clean eating. This simply means eating only natural unprocessed, preferable organic food and plenty of seasonal fruit and veg washed down with a couple of litres of water a day. That is all brilliant in my book but sticking to it is easier said than done when it’s cold outside and there’s a bacon sarnie on offer made with soft white bread and a dollop of brown sauce. But as it’s January and we are all trying to be good I thought I’d create a dish that feeds body and soul, tastes brilliant and puts a smile on your face. At it’s heart there is farro which is partially cooked wheat grains beloved in Northern Italy, now available in all large supermarkets and healthfood stores. They pack a hearty flavour punch and have a nutty taste without weighing you down. Great in soups, stews, stuffings, salads,whatever. There are also green lentils in there for low fat protein and they also have the advantage of not needing any soaking and are pretty quick to cook. Roasted cauliflower, one of my favourite veggies in winter, adds crunch and a welcome change of texture along with the nuts, cranberries and capers, keeping each mouthful interesting to the last. Don’t be put off by the longer than average recipe list, you’ll probably have most of it in your storecupboard. I like to serve this at room temperature but any leftovers will keep in the fridge for several daysto make a perfect lunch, or just scoop out a forkful as you are passing to keep hunger pangs at bay.
In other news, I have a new facebook page where you will be able to keep up to date with all that is happening in my kitchen, garden and on my travels. And it’s the best place to post comments or pose culinary questions. I look forward to hearing from you.

Farro and cauliflower pilaff with nuts and seeds
Print Recipe
Prep Time
30 mins
Cook Time
20-25 mins
Prep Time
30 mins
Cook Time
20-25 mins
Farro and cauliflower pilaff with nuts and seeds
Print Recipe
Prep Time
30 mins
Cook Time
20-25 mins
Prep Time
30 mins
Cook Time
20-25 mins
Ingredients
Servings:
Instructions
  1. Heat the oven to 190C/fan 170C/Gas 5.Spread the cauliflower florets and red onion in a shallow baking dish. Drizzle over 2 tbsp of the oil, a good sprinkling of salt and pepper and toss everything together. Roast for 20-25 mins, shakking halfway through until the cauliflower is just tender but not too soft.
  2. Tip the lentils into a large pan and cover with plenty of cold water(no salt) Bring to the boil, then reduce the heat and simmer for 10 mins. Add the farro and more water from the kettle if necessary and continue to simmer for a 10 mins until both the lentils and farro are just tender but still with a bit of bite. Drain well.
  3. Toast the cumin seeds in a small dry pan until they start to release their fragrance, then grind in a pestle and mortar. Add the juice of the lemon, the honey, salt and pepper. Add the remaining 3 tbsp of the oil and mix well.
  4. Toast the nuts and sunflower seeds in the same pan you used for the cumin seeds until they just start to catch a bit of colour. Tip onto a chopping board and roughly chop.
  5. Tip the lentils and farro into a large bowl and add the nuts and seeds, cranberries, capers , half the herbs and half the dressing. Mix well. Fold in the warm cauliflower and onion along with any pan juices and fold everything together well. Taste and add more seasoning if necessary.
  6. Divide between 4 dished plates and drizzle over the remaining dressing. Add a lemon wedge and dollop of yogurt on the side and scatter with the remaining herbs. Serve warm or cold.
Share this Recipe
Powered byWP Ultimate Recipe

Warmly spiced roasted pineapple

At this time of year I am often seduced into buying a pineapple as they always look so exotic and cost so little for their size. I take it home and arrange it carefully in the fruit bowl where it sits being admired until it is way past it’s best. I think it’s laziness on my part as it always seems such a faff to prepare it. But I vow to change my ways and have now devised a great no-fuss way of cutting it up. Then to keep things simple I love to roast it with a few warm spices and a splash of orange and serve it warm. Any leftovers also also good eaten straight out of the fridge with a spoonful of yogurt.

Warmly spiced roasted pineapple
Print Recipe
Prep Time
20 mins
Cook Time
25-30mins
Prep Time
20 mins
Cook Time
25-30mins
Warmly spiced roasted pineapple
Print Recipe
Prep Time
20 mins
Cook Time
25-30mins
Prep Time
20 mins
Cook Time
25-30mins
Ingredients
Servings:
Instructions
  1. Heat the oven to 190C/fan 170C/Gas 5. Using a large sharp knife cut the top and base from the pineapple. Stand it upright and slice down the skin all round to remove it, following the curve of the fruit..
  2. Cut diagonal shallow v shapes from the flesh from top to bottom, following the lines of the brown eyes to remove them.
  3. Cut the pineapple in half through the core, then into quarters the same way.
  4. Cut the pineapple into thick slices and put in a large shallow ovenproof dish. Pare thin strips of peel from one of the oranges.
  5. Squeeze the juice from both oranges and pour over the pineapple. Tuck the cinnamon and star anise around the fruit and sprinkle with sugar.
  6. Bake for 20-25 mins, shaking the dish halfway through, until the fruit is tinged brown at the edges. Serve warm or cold as it is or with coconut ice cream or generous spoonsful of clotted cream.
Share this Recipe
Powered byWP Ultimate Recipe

Mincemeat and apple cake

Ok, so I know that we are supposed to be on the wagon, down the gym and following a blameless diet but before I can start all that there is the question of leftovers, and what to do with them. I can’t just chuck them out, that would be wasteful and along with all the anonymous foil parcels I daren’t unwrap that are lurking in the fridge there is half a jar of mincemeat, a couple of spongy apples and a loads of nuts in shells staring at me accusingly. Why oh why do I always buy so many nuts in shells when nobody eats them? I think it’s the memory of my dad cracking shells from a big basketful on his lap while wearing a slightly wonky paper hat that means Christmas is just not the same without them(or him). And he would always pass me a couple, but never the brazils, they were his favourites. So with family coming for the weekend the only answer to my dilemma is of course cake. This is a pretty hands-free recipe as most of the work is done in the food processor so in a matter of moments it’s ready to fling into the oven. It makes a good sized cake and if you can’t eat it now it will freeze beautifully ready to reward you for losing that first couple of kilos.


Mincemeat and apple cake
Print Recipe
Servings Prep Time
12 slices 20 mins
Cook Time
1-11/4hours
Servings Prep Time
12 slices 20 mins
Cook Time
1-11/4hours
Mincemeat and apple cake
Print Recipe
Servings Prep Time
12 slices 20 mins
Cook Time
1-11/4hours
Servings Prep Time
12 slices 20 mins
Cook Time
1-11/4hours
Ingredients
Servings:
Instructions
  1. Heat the oven to 160C/fan 140C/Gas 3. Butter and base line a 20cm deep cake tin. Tip the flour and spice into the food processor, add the butter, cut into cubes and process to form a crumbly texture.
  2. Add the sugar and process briefly to mix.
  3. Tip the mixture into a large bowl and add the eggs, apples, raisins and milk. Beat together until it all comes together to a soft batter with no dry mix visible.
  4. Spoon half the mixture into the prepared tin and smooth over. Drop spoonfuls of mincemeat evenly over the top, then carefully smooth almost to the edges.
  5. Spoon the remaining mixture over the mincemeat and smooth the top. Scatter with nuts and demerara sugar and bake for 1-1/4 hours until the cake is nicely browned and firm to the touch.
  6. Cool in the tin for 10 mins, then turn out, peel off the paper and cool completely before cutting into generous slices. You can dust the top lightly with icing sugar if you fancy. As this cake contains fresh fruit it will only keep in the tin for 3-4 days.
Share this Recipe
Powered byWP Ultimate Recipe

To market, to market

Frome is a town that is growing on me. It has an energy that is infectious and downright happy and the monthly Frome Independent market reflects all that is brilliant about the town. On the first Sunday of each month the town centre is closed the traffic and a huge artisan village is created, with stalls crammed into every corner offering artisan homewares and jewellery, a farmers market, food stalls with too much choice for my greed and live music at every turn. The party goes on all day and the place is buzzing with chatter, laughter and general goodwill. Not wanting to miss out on being part of this vibe we joined in the fun last Sunday to set up our tiny suitcase stall selling vintage French homewares collected over our ten years in France.

IMG_0458
Of course not content to leave it at that I baked over a hundred madeleines to reflect the theme, plus every buyer was sent on their way with one of my recipes- the soda bread, tomato and goats cheese tartlets and almond and orange shortbread were particular favourites with the crowd. If you are in the mood for a bit of light baking have a go at these Raspberry and white chocolate madeleines. They are very good on their own with a cup of tea or on the side with creamy desserts such as lemon posset or crème brulee. Oh and if you feel like a bit of batch baking they freeze really well.
IMG_0457
Raspberry and white chocolate madeleines
Makes about 15

100g plain flour
100g caster sugar
100g butter, melted
1 whole egg, plus 1 egg white
1 tbsp clear honey
finely grated zest of 1 large orange
50g white chocolate, broken up

1 Heat the oven to 190C/fan 170C/Gas 5. Butter 15 madeleine moulds(or use tartlet tins if you don’t have the moulds) and dust lightly with flour.
2 Mix the flour and sugar in a bowl. Put the butter, egg yolk, honey and orange zest into a separate bowl and whisk with a fork to mix. Whisk the two egg whites until stiff. Fold the butter mixture into the dry ingredients until evenly mixed, then fold in the egg whites in two batches using the whisk blades.
3 Divide between the prepared moulds and bake press a raspberry intot he centre of each.Bake for 12-15 mins until golden brown and firm to the touch. Leave to cool in the tins for a couple of minutes, then turn out and cool on a wire rack.
4 Melt the chocolate in the microwave or in a bowl over hot water. Leave to cool for a few minutes until thickened, then drizzle over the madeleines. Leave to set.

Cracking good crackling

Of all the cuts of pork to choose from I have to say that  belly is my all-time favourite. I know it’s a fatty cut but if you roast it slowly much of the fat melts away leaving a fabulously juicy and flavoursome meat. Choosing very lean cuts can be a disappointment as fat means flavour every time. This week I picked up my meat and veggies from our local Food Assembly which is always a pleasure. Not only do I know that the produce is grown and reared locally but I also get to meet the producers and get a few tips from them. Bill the Butcher recommended that I unwrap the belly 24 hours before cooking it to give the skin plenty of time to dry out to ensure good crackling. Finishing off this slow cooked piece of pork on the Barbie gives you the most delicious crunchy crackling. The pork can be oven roasted several hours ahead, cooled, then chilled. Bring it back to room temperature for half an hour before cooking it on the Barbie.

Crackling 5 spice pork

2-21/2kg piece belly pork

4 tsp five spice powder

sea salt and pepper

1 Heat the oven to 160C/140fan/Gas 3. Put the pork in a roasting tin and rub all over with the five spice powder, sea salt and pepper. Cook for 21/2-3hours, until the pork is very tender.

2 Have the barbecue ready with the coals not too hot(wait for them to turn grey with no flames) Put the pork on the barbecue skin side down and cook until the skin crackles, about 15-20 mins. Turn it over and cook on the other side for the same time. Spray the coals with a little water if they start to flare. Transfer the pork to a board and cover tightly with foil. Leave to rest for 15 mins, then cut into thick slices to serve.

Serves 6-8

labneh- gorgeously greek

When we were young and broke my sister Annie and I often made our own soft cheese from yogurt by draining it through a j-cloth overnight and adding whatever spices and herbs we had to hand. We served this in rough terracotta bowls with toasted pittas and the cheapest red wine we could lay our hands on. Happy days indeed.

I have noticed lately that labneh, as this is what it is called, is appearing on restaurant menus all over the place. It’s a bit of a shock to know that you have been around so long that you see a trend coming round for the second time. Still, I reckon after all these years it’s about time I had a go at making it again.

Labneh is a classic Middle Eastern staple and is essentially Greek yogurt salted then strained overnight to remove the whey. This can be served very simply with a slick of good olive oil, or flavoured in  many ways. I love it chilli spiced and scattered with pomegranate seeds, or scattered with torn mint or any other soft summery herbs- coriander, chives, basil, chervil and dill are all good. Follow my step-by-step recipe and or pick one of my other suggestions for finishing it off or go off piste and do your own thing.

  1. Tip a 500ml tub of greek yogurt(sheeps, goats or cows) into a bowl. If you want to go superhealthy use 0%- it works very well. Stir in 1 tsp sea salt. Set a sieve over a bowl or jug and line the sieve with muslin or a new piece of j-cloth. Pour the yogurt into the lined sieve.straining yogurt
    Set the bowl on a tray to catch any leakage then put the whole thing in the fridge overnight until the whey has drained out and you are left with a stiff cheese. Tip the cheese into a bowl and stir lightly.
  2. Heat a little olive oil in a small pan, add 1 tsp cumin seeds and fry for a minute or two until they start to give off their aroma. Add a chopped or thinly sliced clove of garlic and fry briefly. Remove from the heat and stir in a finely chopped red chilli.adding spices
  3. Cool slightly then fold three quarters into the cheese. Spoon into a bowl and scatter with the remaining mix, and a little more olive oil if liked.finishing labneh

Or try these:

a few chopped black olives, a teaspoon of capers and a few shreds of orange zest with a little olive oil stirred through.
a few roughly crushed peppercorns and a small handful of chopped mint
a tablespoon of toasted sesame seeds and a slick of olive oil
a slick of olive oil and a scattering of Za’atar
scatter with chopped red chilli and pomegranate seeds
a drizzle of honey- serve with almond thins